Healthy Fruit Pizza with a Lemony Greek Yogurt Filling

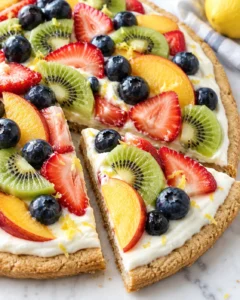
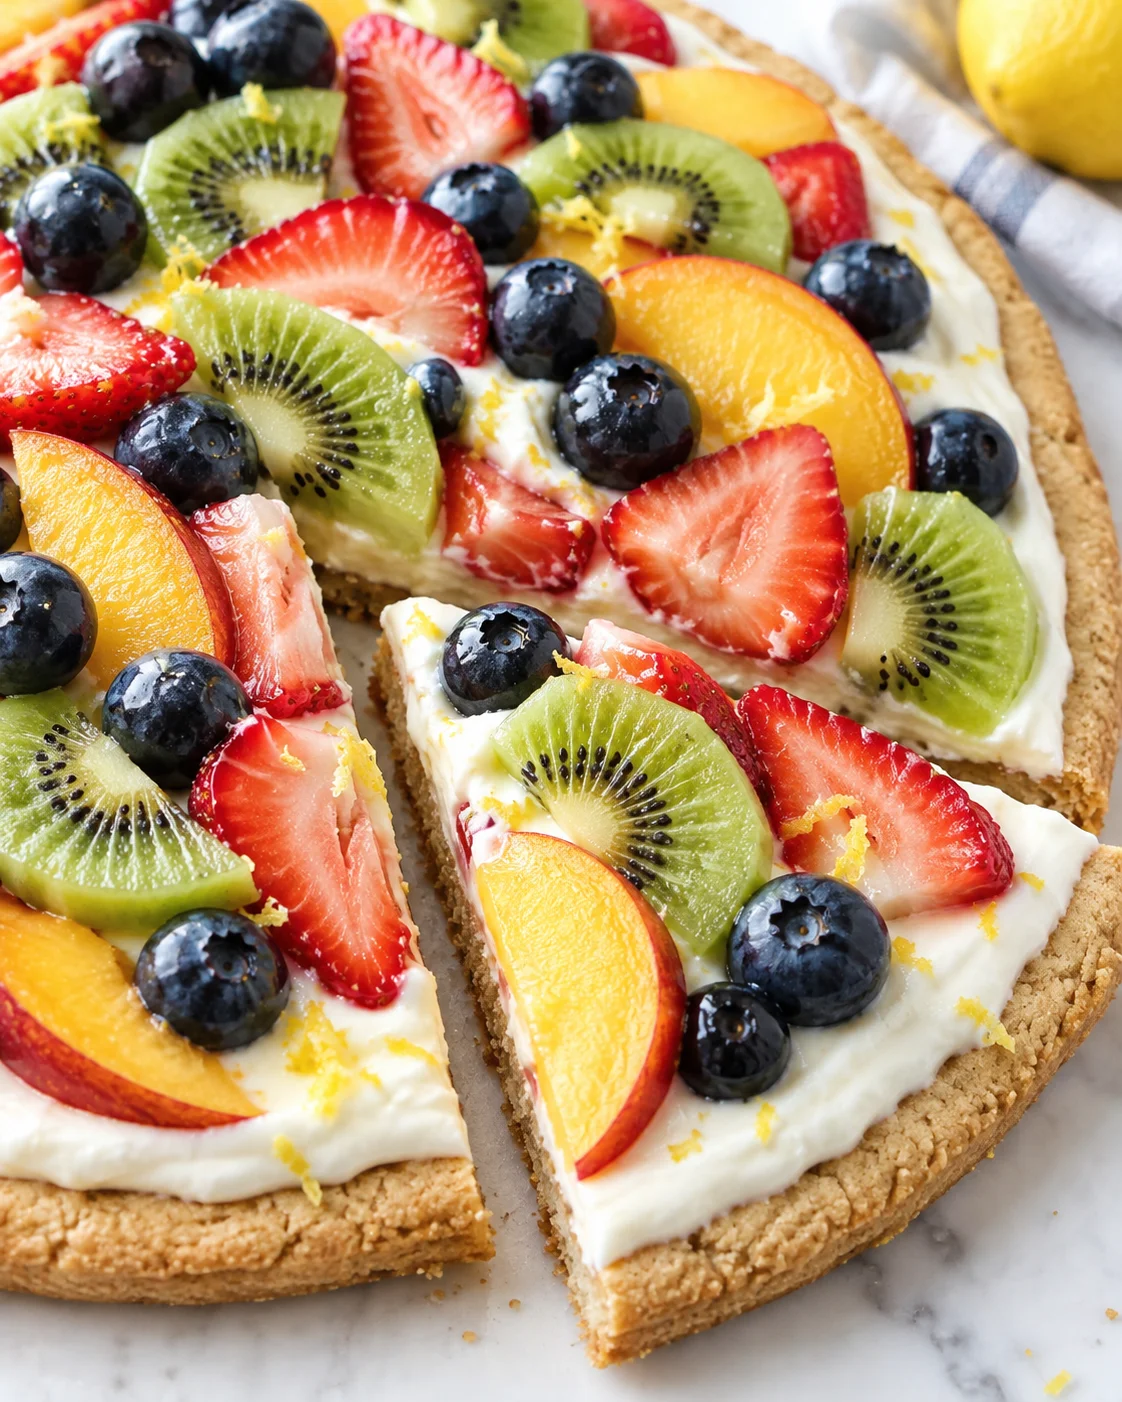
This healthy fruit pizza brings together a soft, grain-free sugar cookie crust, a smooth lemony Greek yogurt filling, and a colorful layer of fresh berries. It has the cheerful look of a party dessert, but the steps are approachable enough for an everyday baking project or an afternoon in the kitchen with the kids.
The crust is built with blanched almond flour and coconut flour rather than grain flour, while the filling keeps the familiar cream cheese character and adds nonfat Greek yogurt. Lemon zest is the small but important detail that makes the filling taste bright and gives the finished dessert a sunny finish. After the pizza gets its fruit topping, a short refrigerator rest makes it easier to eat and gives the layers time to settle.
Serve this healthy fruit pizza at a summer gathering, bring it to a BBQ, or set it out whenever you want a dessert that looks special without complicated decorating. The listed berries are a beautiful starting point, and the fruit can be changed to suit what you like.
Why You’ll Love This Healthy Fruit Pizza
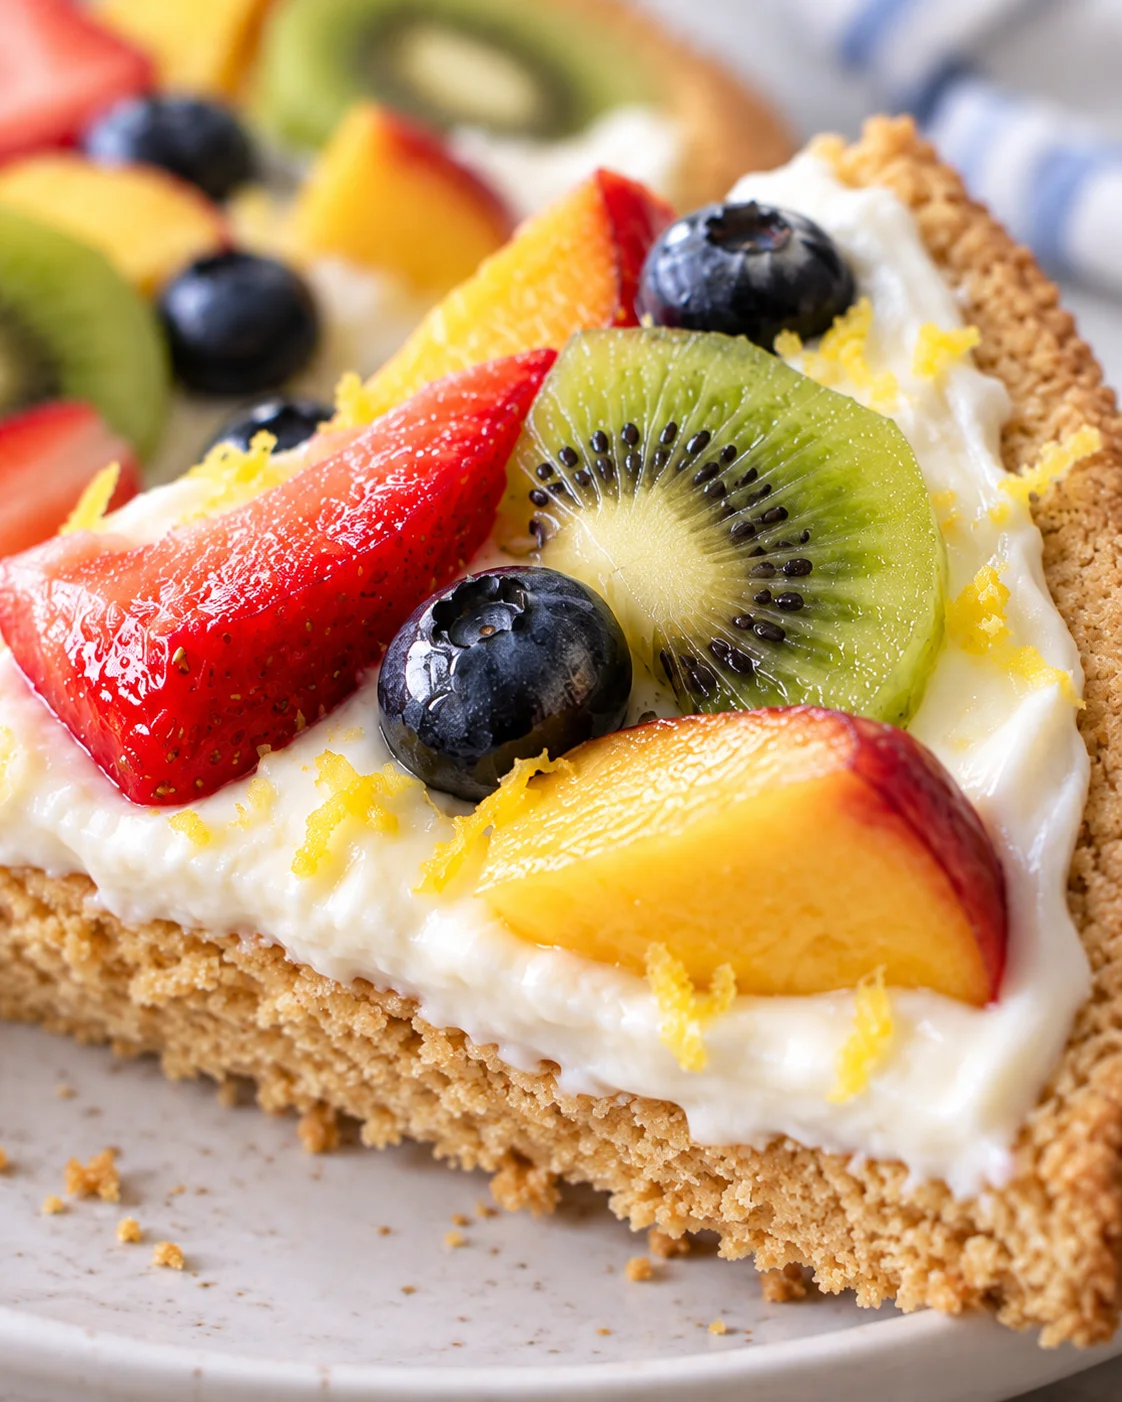
This dessert has several textures in one slice. The base is a baked sugar cookie crust with a tender, rich feel from almond flour, and the topping is thick and creamy rather than runny. Fresh berries add color and a juicy contrast to the smooth filling. Slice the fruit thinly and lengthwise, and the finished pizza becomes much easier to portion and eat.
The flavor follows a familiar fruit-pizza pattern, but the balance is a little different from a classic cream cheese version. Cream cheese keeps the filling tangy and recognizable, Greek yogurt lightens the mixture, honey sweetens both the crust and filling, and lemon zest keeps the whole dessert from tasting flat. You can adjust the filling’s proportions to match your taste, but the lemon zest should stay in the plan because it supplies an important burst of flavor.
It is also a useful recipe for a mixed dessert table. The crust is grain-free and the recipe is described as gluten-free, so it offers a different option from desserts made with wheat flour. It is festive enough for a summer BBQ, simple enough for a family project, and flexible enough to work with berries or other favorite fruit.
Most of the work is straightforward: mix the wet and dry ingredients separately, bring them together into a thick dough, press the dough into a greased pan, and blend the filling while the crust bakes. The most important handling details are practical ones. Wet hands and utensils keep the dough from sticking, generous greasing helps the crust release, and loosening the dough from the pan’s edge before baking makes removal much easier later.
Ingredients
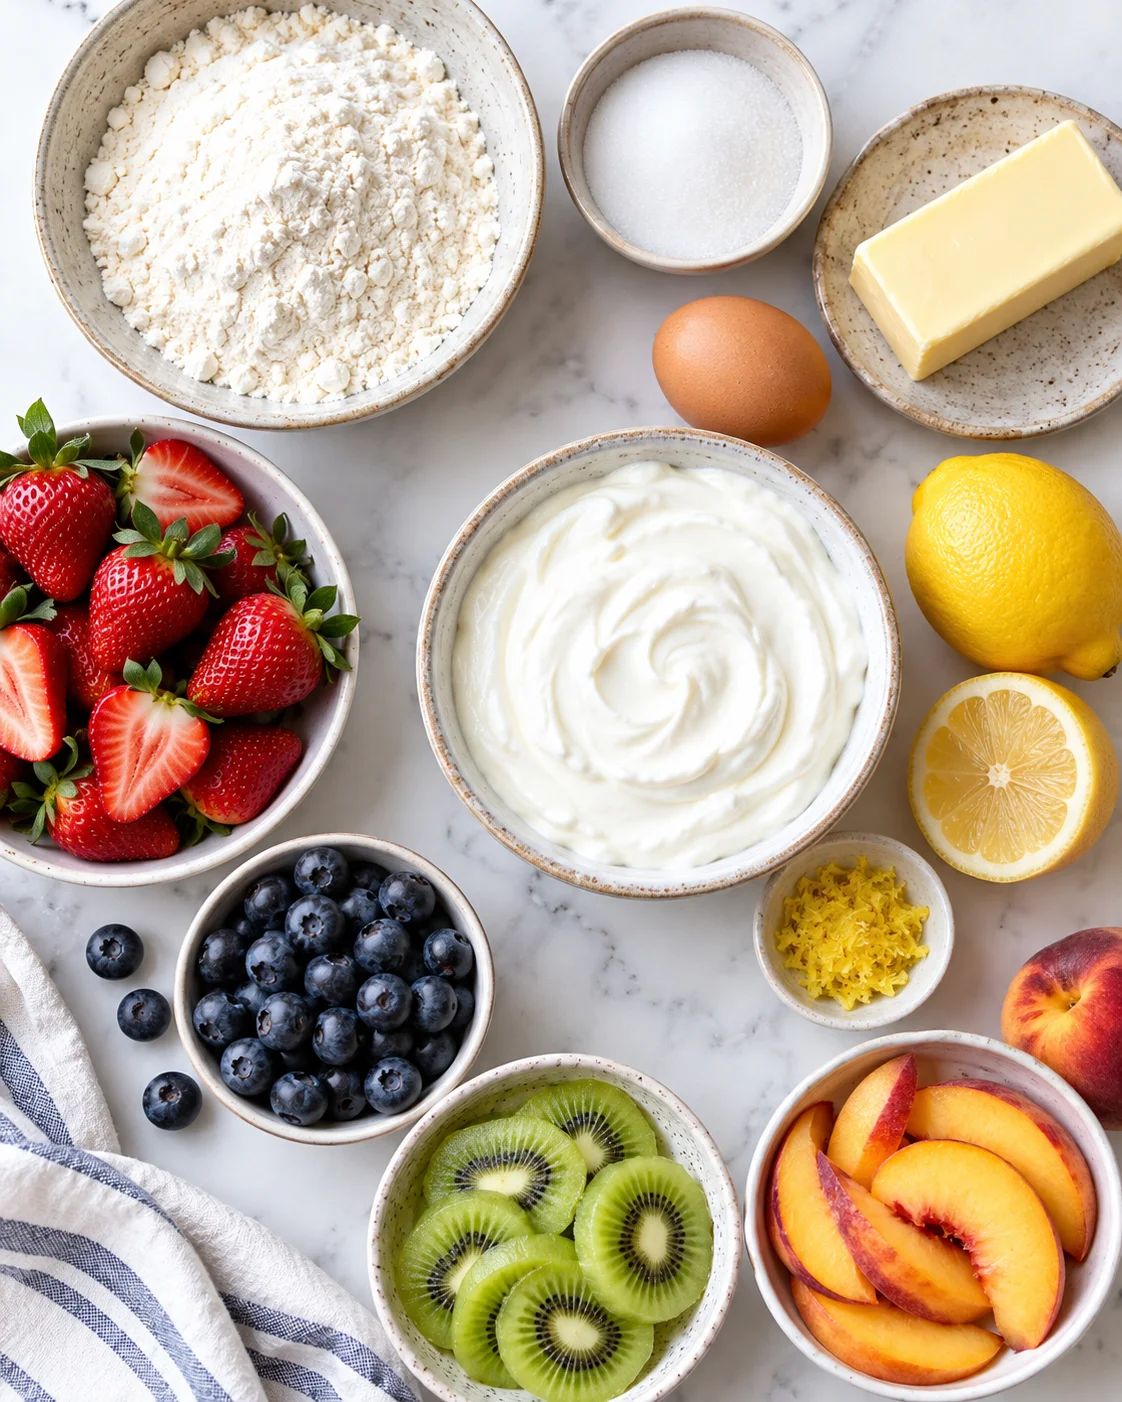
Gather the ingredients before beginning so the crust, filling, and fruit can move through the recipe in order. The amounts below are the complete formula for this fruit pizza.
For the sugar cookie crust
- Wet ingredients: 1 large egg, 1 teaspoon vanilla extract, ¼ cup honey, and 2 tablespoons coconut oil, softened.
- Dry ingredients: 2 cups blanched almond flour, ½ cup coconut flour, ½ teaspoon baking soda, and a pinch of salt.
Blanched almond flour forms the main base of the grain-free crust, while coconut flour adds structure and helps create the thick dough. Use softened coconut oil so it can mix evenly with the egg, vanilla, and honey. Because the dough becomes thick as the dry ingredients are added, plan to finish combining it with your hands.
For the Greek yogurt filling
- 3 ounces cream cheese
- ½ cup nonfat Greek yogurt
- 1.5–2 tablespoons honey, or more depending on how sweet you like it
- Zest from ½ lemon
Cream cheese gives the filling the familiar tang of a traditional fruit pizza, while Greek yogurt makes it smooth and creamy with a lighter feel. The listed amounts are the default formula, but feel free to adjust the proportions of the filling to suit your taste. The honey amount is intentionally flexible within the listed range, with the option to add more depending on how sweet you like the filling. Lemon zest is essential to the flavor, so zest half a lemon and reserve a little extra if you want to garnish the top.
For the fruit topping
- ½ cup blueberries
- ½ cup strawberries
- ½ cup blackberries
The combination of blueberries, strawberries, and blackberries gives the pizza a classic berry finish. You may replace your favorite fruit for any of the berries used here. Whatever fruit you choose, slice it lengthwise and fairly thinly; thin pieces are easier to arrange and make each slice easier to eat.
How to Make Healthy Fruit Pizza
-
Prepare the pan and oven. Preheat the oven to 350ºF. Grease a 10-inch cast iron pan or a 10-inch round pan, then set it aside. A well-greased pan matters because the cookie crust needs to come out in one piece after it cools.
-
Mix the wet ingredients. Add the egg, vanilla extract, honey, and softened coconut oil to a medium-size bowl. Mix the wet ingredients together, then set the bowl aside while you prepare the dry mixture.
-
Mix the dry ingredients separately. In another bowl, combine the blanched almond flour, coconut flour, baking soda, and pinch of salt. Separating the bowls at this stage helps distribute the baking soda and salt through the flours before the dough comes together.
-
Make the thick dough. Slowly add the dry ingredients to the wet ingredients. The dough will be thick. Once it becomes difficult to stir, wet your hands with water and use them to mix and knead the dough until everything is combined. The moisture on your hands helps prevent the dough from sticking. Form the finished dough into a ball.
-
Flatten the crust in the pan. Place the dough ball in the greased round pan. Press and flatten it evenly across the bottom of the pan so the crust reaches the edges in an even layer. Take your time here; an even base makes it easier to spread the filling and arrange the fruit later.
-
Loosen the edge before baking. Grease a spatula and carefully slide it around the edge of the cookie dough to separate the crust from the pan. This step is easy to overlook, but it helps the baked crust release after cooling. Work around the perimeter without gouging the flattened dough.
-
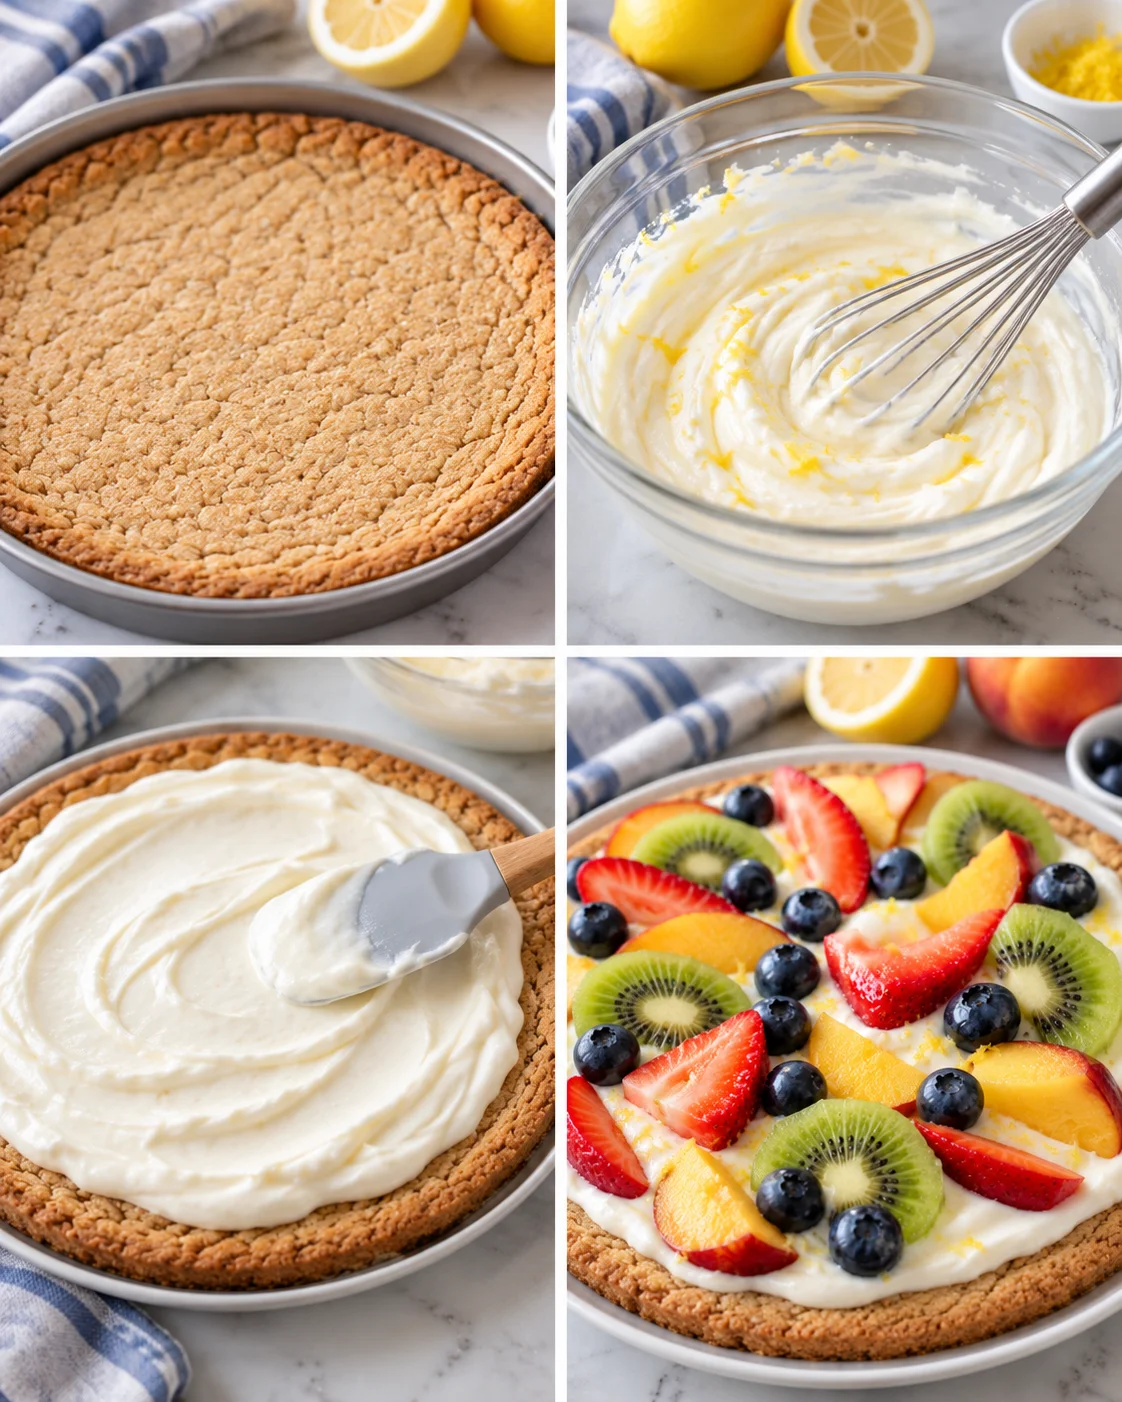
Bake the crust. Bake for 14–17 minutes. Keep the pan level as it goes into the oven and use that time range as the baking guide.
-
Blend the filling while the crust bakes. Place the cream cheese, Greek yogurt, honey, and lemon zest into a blender or a single-serve smoothie cup. Blend until the mixture is smooth. The finished filling should be thick and creamy, with no rough or separated appearance.
-
Cool and remove the crust. Let the crust cool completely enough to handle, then remove it from the pan. Do not spread the filling over a hot crust; cooling gives you a more stable surface and keeps the creamy topping from being disturbed as you spread it.
-
Add the filling. Spread the lemony Greek yogurt filling evenly over the top of the cooled crust. Work gently toward the edge so the filling forms one smooth layer without pulling up the cookie base.
-
Decorate with fruit and lemon zest. Arrange the blueberries, sliced strawberries, and blackberries over the filling. Finish with a garnish of lemon zest. If you selected different fruit, keep the pieces thin so the topping remains easy to cut and eat.
-
Chill briefly, then serve. Place the fruit pizza in the refrigerator and let it sit for 15–20 minutes. This short rest makes it easier to eat. If you are ready to dig in immediately, a slice can still be enjoyed, but the refrigerator set gives the assembled dessert a more settled texture.
Tips for Success
Keep the dough from sticking
The crust dough is thick, so a spoon may stop being the easiest tool once the dry and wet mixtures meet. Wet your hands before mixing and kneading. The thin layer of water keeps the dough from clinging to your fingers while still allowing you to bring it together into a ball. If you use other utensils during mixing or shaping, wet those as well.
Grease more than just the pan surface
A well-greased pan is one of the recipe’s most useful safeguards. Grease the pan before adding the dough, and grease the spatula before working around the edge. The goal is to make the baked crust easier to lift rather than forcing a knife or dry tool between the cookie and the pan.
Separate the edge before baking
Once the dough is evenly flattened, run the greased spatula carefully between the dough and the edge of the pan. Doing this before the oven stage means the crust is already loosened when it is time to remove it. It also helps you keep the finished round intact instead of trying to release a warm, delicate edge later.
Look for the right filling texture
Blend the filling until it is smooth, thick, and creamy. A quick blend that leaves visible lumps will not give you the same even layer across the crust. Once the filling reaches that texture, spread it gently over the cooled base. The topping is meant to sit on the crust, not run across it.
Give the fruit an easy-to-eat shape
Slice strawberries and other larger fruit lengthwise and fairly thinly. Smaller, thinner pieces are easier to arrange into a colorful topping and easier to cut through with a fork. This is especially helpful when you are serving the pizza at a gathering or sharing it with children.
Variations and Substitutions
Change the fruit topping
The listed topping uses blueberries, strawberries, and blackberries, but you can substitute your favorite fruit for any of those berries. Keep the amount and shape practical for the surface of the pizza, and slice the fruit lengthwise and thinly so the finished dessert remains easy to eat. A mix of colors makes the topping especially inviting, but the recipe leaves the fruit choice open.
Adjust the filling to taste
Use the listed amounts of cream cheese, Greek yogurt, and honey as the default formula, but feel free to adjust the proportions of the filling to suit your taste. You can also add more honey if you prefer a sweeter result. The crust already contains honey, so taste is the guide for the creamy layer. Keep the lemon zest in the mixture even if you change the filling proportions; it is the bright note that gives the filling its lemony character.
Make a dairy-free version
For a dairy-free direction, use vegan cream cheese and dairy-free yogurt as options for the filling. Choose products that blend into a thick, creamy filling, and keep the rest of the method the same: blend the filling, cool the crust, spread the topping, add fruit, and chill briefly. Because products vary, check the texture as you blend rather than assuming every dairy-free combination will behave identically.
Keep the grain-free crust intact
The crust’s structure comes from blanched almond flour and coconut flour. If you are making this recipe for someone avoiding gluten, this fruit pizza is gluten-free and does not use grain flour in the crust. Keep the listed flour combination together rather than swapping in an unmeasured alternative, since the two flours contribute different textures to the thick dough.
Storage, Make-Ahead, and Freezing
For the best texture, keep the finished fruit pizza covered and refrigerated. The topping includes cream cheese, Greek yogurt, and fresh fruit, so the assembled dessert belongs in the refrigerator rather than sitting out for an extended time. Return leftovers to the refrigerator and check the fruit and filling for freshness before serving.
The recipe includes a 15–20 minute refrigerator set after the fruit is added. Use that short chill when you want the dessert to feel more settled and easier to eat. If you are organizing the work ahead, measure the ingredients, prepare the fruit, and keep the cooled crust and filling ready for assembly; finish by spreading the filling, adding the fruit and lemon zest, and chilling the completed pizza.
Serving Suggestions
Bring this fruit pizza to a summer BBQ or another casual gathering where a colorful dessert can be cut and shared. The round cookie crust gives it the look of a pizza, while the berries and lemon zest make it feel ready for warm-weather entertaining. It also works as a hands-on kitchen project for you and the kids: children can help arrange thin fruit slices once the filling has been spread.
For the easiest serving, let the assembled pizza complete its 15–20 minute refrigerator rest before cutting. Thin fruit pieces make each portion simpler to manage, and the short chill helps the topping stay in place. You can also serve it as a fun dessert for any occasion when you want a grain-free, gluten-free option alongside other sweets.
Keep the presentation simple. Spread the filling evenly, arrange the berries over the top, and finish with lemon zest. The colors do the decorating work, so there is no need to add extra toppings or a complicated finish.
Frequently Asked Questions
Is this healthy fruit pizza gluten-free?
This fruit pizza is gluten-free, and its crust uses blanched almond flour and coconut flour rather than grain flour. As with any food prepared for someone with a serious allergy or strict dietary need, check the labels of packaged ingredients and prevent cross-contact in your kitchen.
Can I use fruit other than the listed berries?
Yes. Substitute your favorite fruit for any of the berries used. Slice the fruit lengthwise and fairly thinly so it is easier to arrange on the creamy filling and easier to eat once the pizza is cut.
Why is lemon zest important in the filling?
Lemon zest gives the filling its bright, lemony flavor and adds a sunny finish to the dessert. Use the zest from ½ lemon in the blended filling, then garnish the completed pizza with lemon zest as directed. Even if you adjust the filling proportions or honey to suit your taste, keep the zest because it is a key part of the flavor.
How can I make the fruit pizza dairy-free?
Use vegan cream cheese and dairy-free yogurt as dairy-free options for the filling. Blend them with the honey and lemon zest until the mixture is thick and creamy, then continue with the cooled crust, fruit topping, and 15–20 minute refrigerator set. Product textures can vary, so use the finished filling’s consistency as your guide.
What pan should I use for the crust?
Use a greased 10-inch cast iron pan or a 10-inch round pan. After flattening the dough evenly across the bottom, run a greased spatula around the edge before baking. That separation step helps the cooled cookie crust release from the pan.
Can I eat the fruit pizza right away?
You can enjoy a slice before the refrigerator rest if you cannot wait, but letting the assembled pizza sit in the refrigerator for 15–20 minutes makes it easier to eat. The short chill gives the filling and fruit topping time to settle over the cooled crust.
Nutrition
The listed nutrition values are 221 calories, 18g carbohydrates, 7g protein, 15g fat, 4g fiber, and 11g sugar. Nutrition information is automatically calculated, so it should only be used as an approximation.